
Wordpress: Video yerleştirme - nasıl çalışır
Bir videoyu Wordpress'e gömmek istiyorsanız, birkaç adım yapmanız gerekir. Bu pratik ipucu ile size nasıl çalıştığını göstereceğiz.
Wordpress: Gönderiye video ekle
Videonun tümüyle entegre edilebilmesi için önce YouTube gibi ilgili bir video seçmeniz gerekir.
- WordPress gönderisini çağırın, imleci videoyu gömmek istediğiniz yere getirin. Şimdi kaynak metne, yani HTML görünümüne geçin ve gömme kodunu ekleyin.
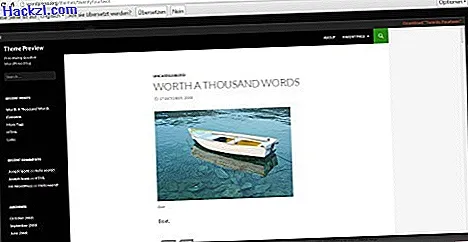
- Örneğin, YouTube'daki videoyu sağ tıklayın ve "Gömme kodunu kopyala" yı seçin (resme bakın).
- Sonra WordPress görünümüne geri dönün ve kodu istediğiniz yere ekleyin. Yayınınızı çevrimiçi görüntüleyebilmeniz için güncelleyin ve kaydedin.

Videoyu yerleştirmek için ipuçları
Yukarıdaki adımlarla, video zaten çevrimiçi ve hiçbir şeyi değiştirmek zorunda değilsiniz. Ancak, videoyu yine de özelleştirebilirsiniz. Bunu yapmak için, HTML görünümünü tekrar açın ve kodda "player-detailpage" adını arayın. Bir ";" ekleyerek artık başka komutlar da belirleyebilirsiniz.
- Video otomatik olarak başlamalıdır: ";" "autoplay = 1" adı. Ardından, sayfanıza gittiğinizde video otomatik olarak başlar.
- Alt çubuk gizlenmelidir: ";" "kontroller = 0" komutu. Alt çubuk kaybolur ve kimse videoyu hızlı ileri veya geri alamaz.
- Üst çubuk gizlenmelidir: ";" "showinfo = 0" kelimeleri. Kimse bunun bir YouTube videosu olduğunu görmüyor.
- Bunun için JW oynatıcıyı kullanmak en iyisidir. Oynatıcı Wordpress'te kuruluysa, medya kütüphanesini açabilirsiniz. Burada "JW Oynatıcı Ekle" düğmesini bulacaksınız.
- Daha sonra film dosyasını seçerseniz, oynatıcı videoyu yükler ve Wordpress'e gömer.
- Oynatıcı ile ilgili özel olan şey, Flash'ın yanı sıra HTML5 videolarını da desteklemesidir. Ayrıca, videolar yalnızca bilgisayara değil, aynı zamanda hareket halindeyken de (iPhone veya iPad) entegre edilebilir.
- Sol üstteki "Dosya ekle" yi tıklayın ve alt menüden "Dosya ekle" işlevini seçin. Daha sonra "Dosyaları seç" düğmesini tıklarsanız, bilgisayarınızdan uygun video dosyasını seçip yükleyebilirsiniz.
- Dosya yüklendikten sonra, sağ altta bir açılır menü bulacaksınız. Bu menüde "Entegre medya oynatıcı" öğesi seçilmelidir. Daha sonra "Gönderiye ekle" düğmesini tıklarsanız, video postanıza eklenir ve kaydedildikten hemen sonra çevrimiçi olur.
CHIP Academy'deki büyük atölye: "Wordpress: ilk web sitesine adım adım"
CHIP Akademisi boyunca, yeni başlayanlar bile WordPress blog sistemiyle nasıl sayfa oluşturacağını öğreniyor. Ayrıntılı adımlarda, kullanıcı WordPress'in nasıl kurulacağını, yapılandırılacağını ve optimize edileceğini öğrenir.
- 6.5 saatin üzerinde Wordpress'i şablon kullanarak nasıl değiştireceğinizi, eklentileri kullanarak işlev ekleyeceğinizi, multimedya dosyalarını nasıl entegre edeceğinizi ve blog sistemini nasıl yöneteceğinizi öğrenin.
- Ayrıca yeni oluşturulan sayfanızı saldırganlardan nasıl koruyacağınızı, aynı zamanda doğru SEO stratejisine sahip arama motorları için nasıl uygun hale getireceğinizi öğreneceksiniz.
- CHIP Akademisi'ni ziyaret edin ve 39, 90 avroya kadar kapsamlı çevrimiçi video atölyesini edinin.
Diğer pratik ipuçlarında, Wordpress'teki dili Almanca'ya nasıl ayarlayacağınızı, bir konuk kitabını nasıl yerleştireceğinizi, bir bülten oluşturmayı veya Wordpress'te reklamları nasıl devre dışı bırakacağınızı da öğreneceksiniz.