
Gimp ile 3D yazı tipi oluşturma - nasıl çalışır
Gimp ile fontlarınıza şık bir 3D efekti verebilirsiniz. Bunu görüntü düzenleme aracıyla nasıl yapacağınızı göstereceğiz.
Gimp: 10 adımda 3D yazı tipi oluşturma
Davetiyeler, çalışma kağıtları veya kendi web sitenizde olsun - 3D metin hemen hemen her yerde harika bir göz alıcıdır. Gimp ile talimatların karmaşık adımlarını resim galerimizde tekrar anlayabilirsiniz.
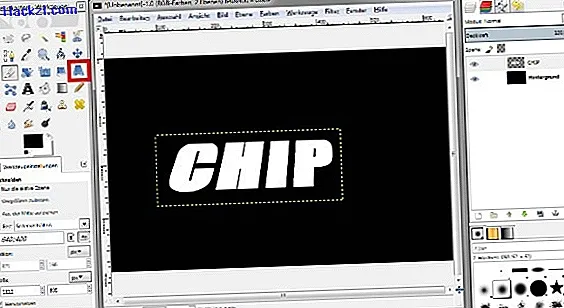
- Gimp'de yeni bir çizim alanı açın ve metin aracını kullanarak istediğiniz harfleri girin. Karanlık bir arka plan üzerinde hafif bir yazı tipi kullanmak en iyisidir.
- Ardından Perspektif aracını seçin ve metninizi biraz geriye yatırın. Sonucu istediğiniz anda "Dönüştür" ü tıklayın.
- Metin katmanına sağ tıklayın ve "Çoğaltılmış katman" girişini arayın. Gizlemek için yeni katmandaki göz simgesini tıklayın.
- Şimdi orijinal metin seviyesine geri döndü: Girişi sağ tıklayın ve "Alfa kanalından seçim" seçeneğini seçin.
- Şimdi metne biraz daha koyu bir renk verin. Bunu doldurma aracıyla veya "Renkler"> "Renklendirme" ile yapabilirsiniz.
- Sonra seçimi "Seçim"> "Hiçbir şey" ile iptal edin.
- Metin katmanına tekrar sağ tıklayın ve "Görüntü Boyutuna Katman" seçeneğini seçin.
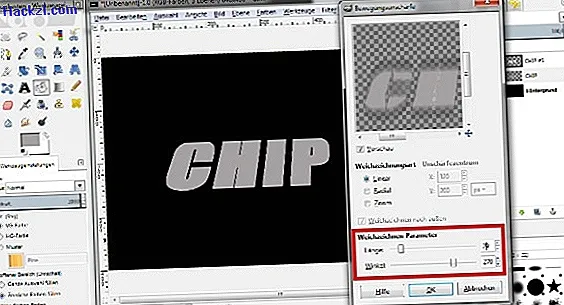
- "Filtreler"> "Bulanıklaştırma" altında "Hareket bulanıklığı" girişini seçersiniz. Kaydırıcıyı "Uzunluk" için "27" ve "Açı" için "270" olarak ayarlayın. Sonra "Tamam" ı tıklayın.
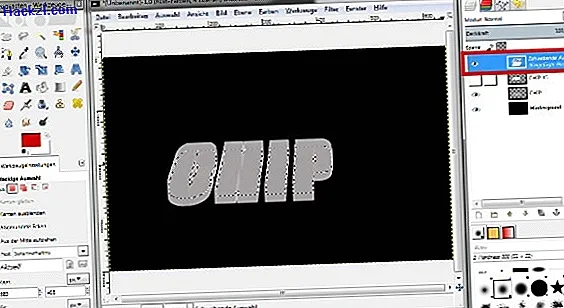
- Şimdi [Ctrl] + [C] tuş bileşimini kullanarak metin katmanını panonuza kopyalayın. Ardından katmanı tekrar eklemek için [Ctrl] + [V] tuş kombinasyonuna 30 ila 40 kez basın. Yazı tipinin yavaşça 3D efekti alması gerekir.
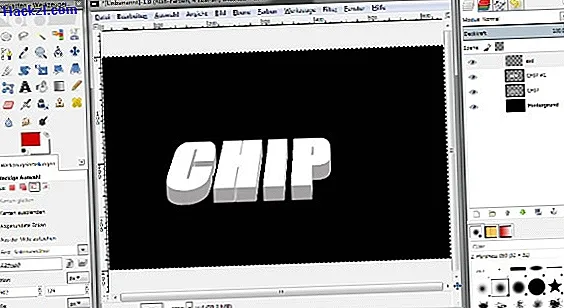
- Son olarak, önceden gizlenmiş katmandaki göz sembolünü etkinleştirin. 3D efekti şimdi bitti.
Resim galerimizdeki tüm adımları size açıkça göstereceğiz.
En son videolar
Perspektif aracını kullanarak metninizi geriye doğru eğebilirsiniz. Perspektiften memnun olana kadar buradaki ayarlarla oynayın.
Metin katmanını kopyalayıp renklendirdikten sonra "Hareket bulanıklığı" filtresini uygulayın. Uzunluk ve açı için doğru değerler burada önemlidir.
Ardından katmanı 40 kata kadar çoğaltın. Bunu yapmanın en hızlı yolu [Ctrl] + [C] ve ardından [Ctrl] + [V] tuş kombinasyonlarını kullanmaktır. Katmanı ne kadar çok eklerseniz, 3D efekti o kadar iyi görünmelidir.
Son olarak, ilk katman kopyasını tekrar gösterin. 3D metniniz artık hazırdır ve kaydedebilir veya başka bir görüntüye kopyalayabilirsiniz.
